

Move files from AutoCal V3 to PC
There are two methods to move tune files from your AutoCal V3 to PC; the method you use with depend on the instructions provided by your tuner.
Connect AutoCal V3 as a USB Thumb Drive to Windows Explorer
To move tune files and log files from AutoCal V3 onto your PC;
- Connect AutoCal V3 to your PC.
- On AutoCal V3 navigate to Options -> File System -> USB Thumb Drive.
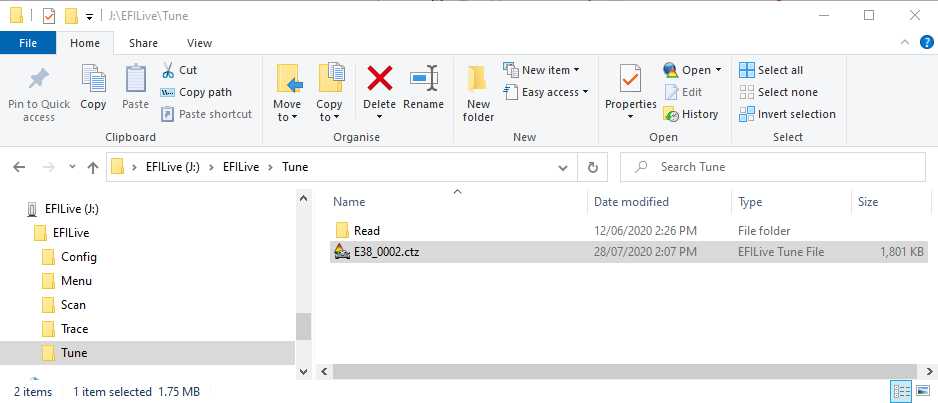
- Using Windows Explorer, locate the files you wish to copy in the correct folder of your AutoCal V3 and copy or drag the files into the desired folder on your PC.
EFILive Explorer
To move tune files and log files from AutoCal V3 to your PC;
- Connect AutoCal V3 to your PC.
- Open EFILive Explorer.
- Navigate to the directory on your PC where you wish to save the file.
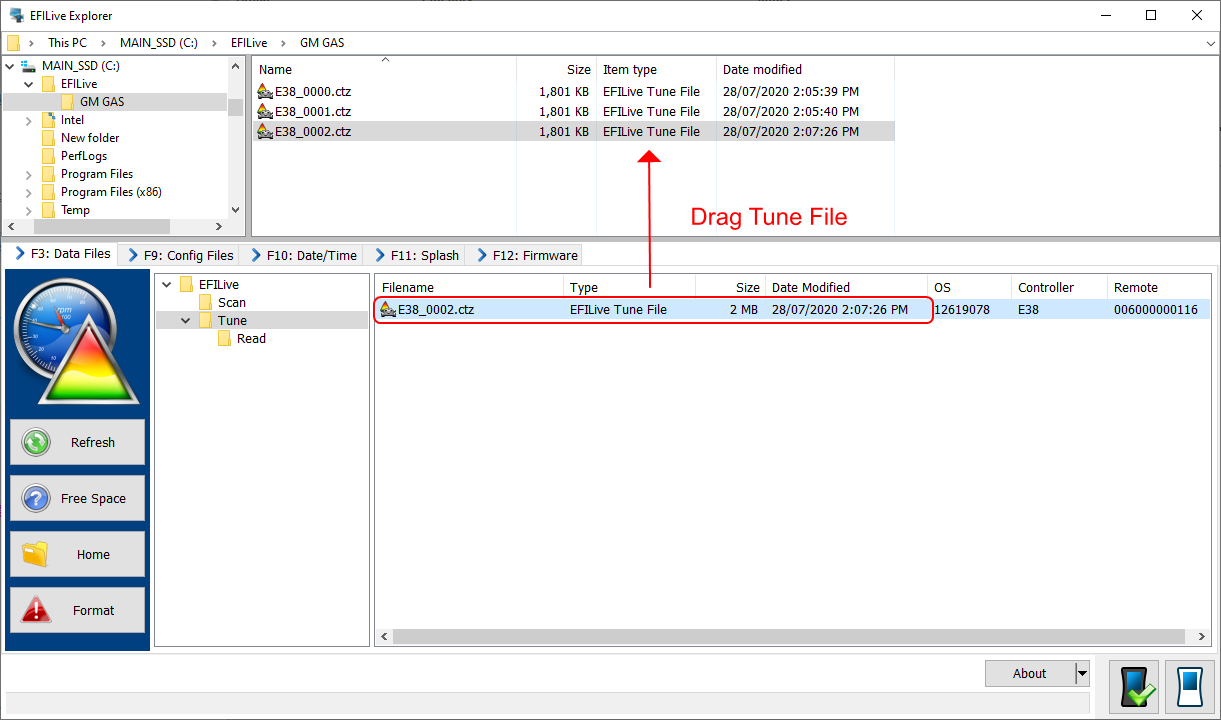
- Navigate to: [F3: Data Files].
- Select appropriate folder on your AutoCal device and drag the selected file to your PC.
Move files from PC to AutoCal V3
There are three methods to move tune files from your PC onto AutoCal V3; the method you use with depend on the instructions provided by your tuner.
Program Quick Setup *.bbx file via EFILive V8 Scan and Tune
The [Program Quick Setup] option programs all selected Scan, Tune, Switch, and DTC options, as well as selected device settings, BBX Quick Setup selections and tune files. Once the device is programmed, AutoCal V3 is configured.
- Connect your AutoCal V3 to your PC.
- Open the EFILive V8 Scan and Tune application.
- Select [F5: BBX] option in the left-hand pane.
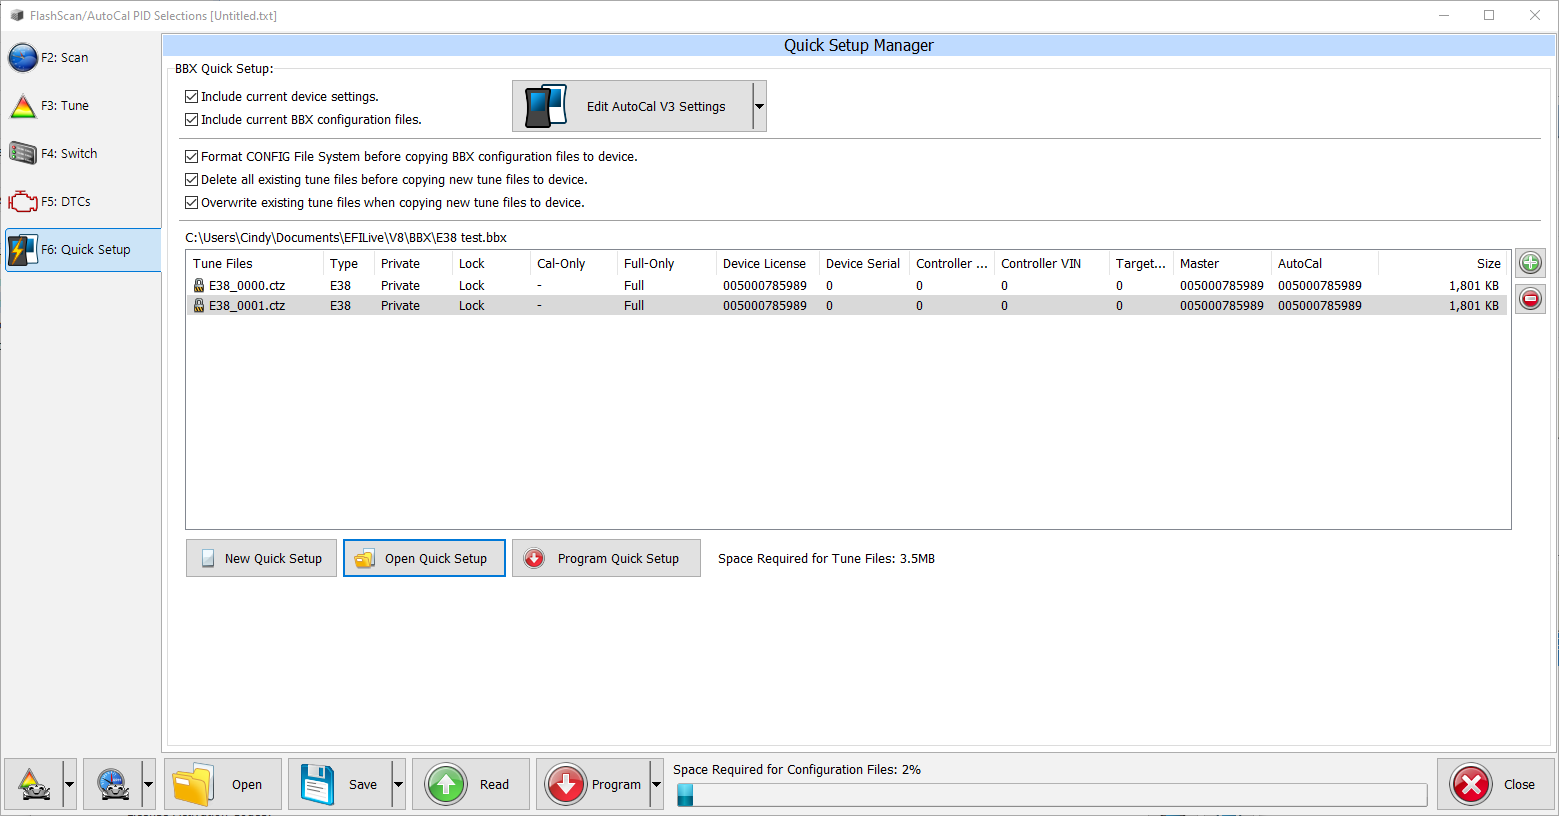
- Select [F6: Quick Setup] option in the left-hand pane.
- Select the [Open Quick Setup] button and navigate to the Quick Setup file your tuner has provided.
- Select the [Program Quick Setup] to program the configuration into AutoCal V3.
- AutoCal V3 users may alter their BBX configuration following the Configure FlashScan and AutoCal for BBX guide, however should discuss this with their tuner before editing their BBX Configuration.
- Executing the [Program Quick Setup] saves the Options.txt file as a temporary file in the folder: \Documents\EFILive\V8\tmp. Where the User's PC virus software prevents this access a "Cannot Create file....Access Denied" message will display. Users should modify their virus software permissions to allow this file to be created.
Connect AutoCal V3 as a USB Thumb Drive to Windows Explorer
To place tune files from your PC onto AutoCal;
- Connect AutoCal V3 to your PC.
- On AutoCal V3 navigate to Options -> File System -> USB Thumb Drive.
- Using Windows Explorer, locate the files you wish to copy on your PC and copy or drag the files into the correct folder on your AutoCal V3.
EFILive Explorer
To place tune files from your PC onto AutoCal;
- Connect your AutoCal V3 device to your PC.
- Open EFILive Explorer.
- Navigate to the directory on your PC where you have saved your file from your tuner.
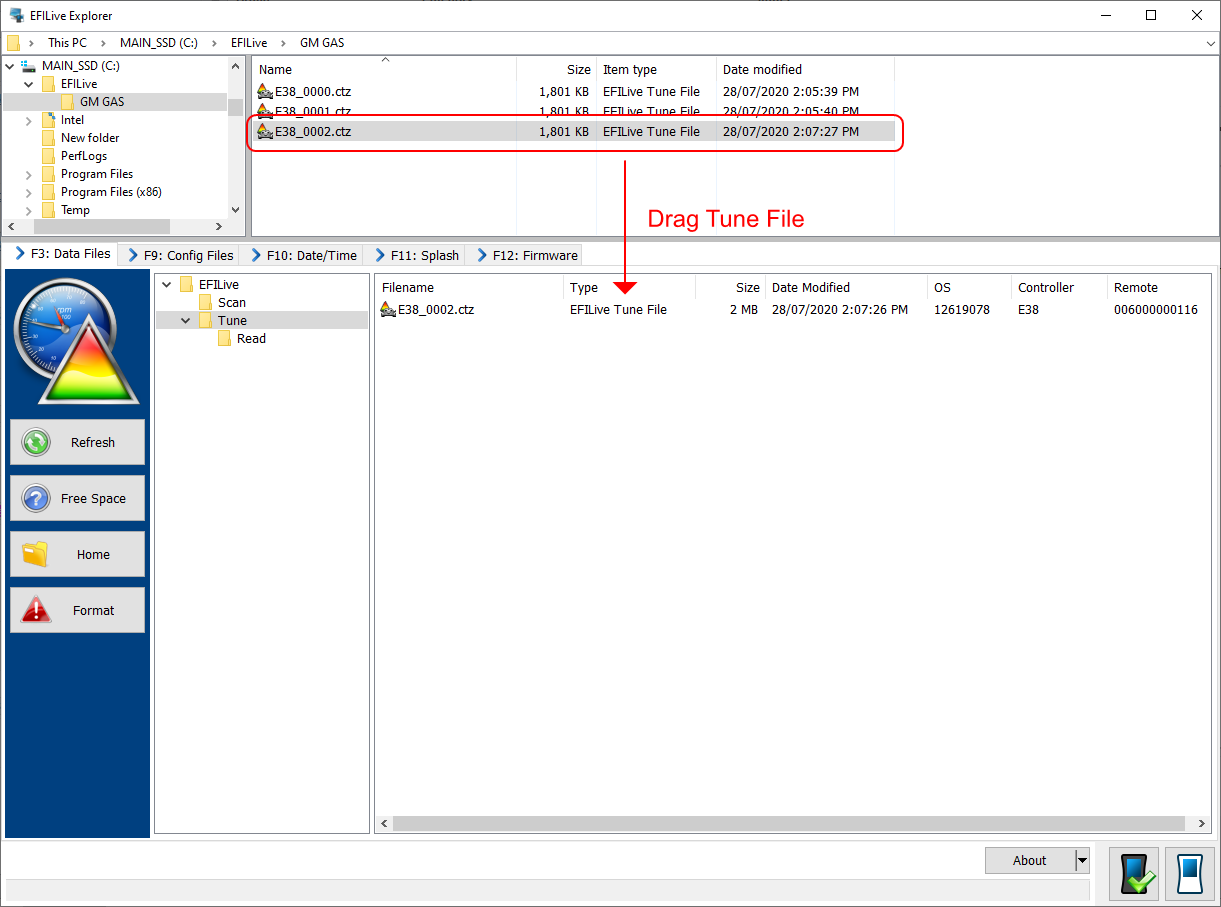
- Navigate to: [F3: Data Files].
- Select appropriate folder on your AutoCal V3 device and drag the selected file from your PC to AutoCal.
Add a comment
Please log in or register to submit a comment.